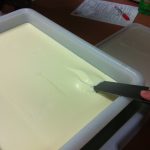
Cheese is made ‘in-the-whey’
When you have cut the curds you are then ‘in-the-whey’ and at the most important step in making good cheese. It is the step in cheesemaking where you can make a big difference to the quality of your cheese. The several steps below are all happening around the same time when you make your cheese.
Temperature curd
By increasing the temperature of the curds and whey closer to 40C, you increase the gel strength of the curd particle, this, in turn, increases the rate of whey (moisture) loss. But be mindful that the rate of acidity development will also change with any temperature change. Based on whether you are using mesophiles or thermophiles or combinations of these cultures.
Stirring of the curd
Stirring of the curd helps with whey removal from the curd. Two reasons, firstly it helps stop curd sinking to the bottom of the vat and secondly as the curd particles collide with each other (collision effect), the wall of the cheese vat and the stirrer, the rate of whey loss increases.
Acidity of the curd during setting
Curd strength increases in a more acidic environment. The more acidic the curd is during the curds and whey the stronger curd will become
Acidity of the curd during curds/whey stage
A higher level of acidity (lower pH) will shrink the curd causing more moisture from the curd, so more calcium, phosphate and other minerals will also be removed from the curd. A Cheddar cheese with a final pH around 5.0/5.1 will have 50% less Calcium than a hard-Swiss style with a final pH of 5.6. The Cheddar will be crumbly and the harder Swiss will be more elastic
Cutting Time
If you completed all the required steps and the curd has not reached the required level of set. If you proceed to cut, you will have soft curd that will result in a curd with higher moisture and higher acidity. The reasons this occurs can be quite varied. If you were using the same milk again, maybe increase CaCl or if the milk is that bad don’t use that milk. But as cutting is delayed longer, the level of acidity will increase. A solution may be to wait until a firm set is achieved, cut smaller or stir longer or faster to remove residual lactose and moisture
Solids levels of the milk
Milk with higher solids levels will set faster and have a stronger curd particle than milk with a lower solids level. Solids include fats, proteins, lactose, minerals, vitamins but it is the increased levels of protein, calcium and phosphorous in the milk that provide that strength of the curd
Washing the curd
Washing the curd involves removing some of the whey, usually 20% – 30% and replacing it with pasteurised water. This will rapidly remove some of the acid and lactose from the curd and some of the minerals. The latter helping to make the curd softer and more flexible. Washing is usually used for sweeter cheese styles. Two simple examples, washing turns a Farmhouse Cheddar into a Colby or turns a Parmesan into a Comte
Dry stirring or stirring after half whey off
This is gently stirring the curd after you have drained most or all the whey to rapidly remove moisture from the curd. Removing moisture also removes lactose. But this process is used for semi-hard and hard cheese mostly. It is also the last resort as it can break up the curd if you are not careful. A scenario is that the correct level of acidity has been reached but the curd still has too much moisture. If you delay the whey-off the acidity will get too high, so half whey off or full whey off at that point, keep curd warm and gently stir it to remove moisture.