Hi, my name is Dave. My cheese making journey only started a short time ago, December 2017 after taking a 2day course with Graham. What started my journey was a conversation I had with a lady on the bus, she was telling me about her recent experience in doing a cheese making course. I have always been interested in learning to do creative things like campfire cooking, smoking meats, sourdough breads and BBQing. After listening to her I became inspired to make cheese and to seek Graham out.
The first batch of cheese I made after the course was Brie. In making this at home, it showed me my kitchen was too small, and I needed to organise myself better. The cheese turned out well, but it had a strong ammonia smell, I did get a good white mould cover, and after researching the ammonia smell, I found that when you want to eat the Brie, leave it on the counter for a while before cutting this will reduce the smell. The Brie was delicious, buttery and creamy. My go to milk is Maleny Farmers choice (pasteurised but not homogenised) which I can purchase at my local shop.
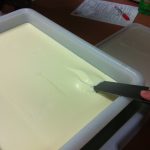
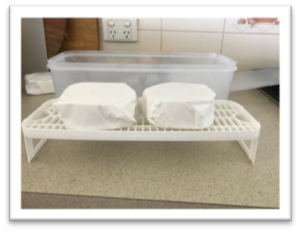
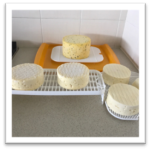
If I compare my recent batch to my first batch, I would say I have improved so much in my organisational skills and knowing what works for me. I use the same milk, I reduce the whey in the vat before hooping so as not to get too much whey in the hooped cheese which I think helps in promoting a good white mould coverage. I now also use a long container with a higher rack which I think encourages more air flow around the cheese. Below is a photo of my Brie/Camembert container I now use with the wrapped cheese. There is a photo of this cheese cut further down the page.
Every 2nd week I finish work at 1.00pm, which is the perfect time for me to make cheese. I try and do at least 2 of the 5 days making cheese. To date I have made Brie, Camembert, Gouda, Triple Brie, Greek feta (using both goat and cow’s milk), Double Gloucester, Monterey Jack, Cotswold and Halloumi. The Goats cheese feta in brine was delicious, salty and crumbly my favourite of the Feta’s.
I am still waiting to try the Double Gloucester, Monterey Jack and Cotswold, the moment of truth is still to come, they are waxed sitting in the cheese cave (AKA wine fridge) maturing.

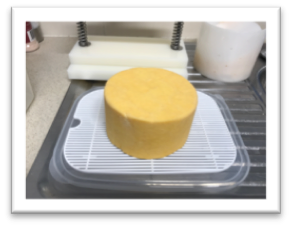
- Double Gloucester
As mentioned I did make Gouda, one I have eaten which was delicious, I have left the other in wax maturing further to see if the flavour increases. I can’t wait to try all of my cheeses. The one I am most looking forward to is the Cotswold which is laced with onion and chives, I believe this cheese is called an Old English pub cheese and pre-dates cheddar it smelt delicious drying out before waxing.
- Cotswold
The most rewarding part of the cheese making process other than tasting the finished result is seeing it sitting out the counter starting to go through its maturing process. There is something about seeing and smelling the finished product and knowing that I created it.
The biggest challenge for me has been overcrowding myself and making stupid mistakes because of this, I needed to organise myself better, read the recipe fully and slow down which I found are the keys to enjoying the whole process.
My wife loves all of the cheese I make, and my daughter particularly likes Feta. My friends are very surprised and impressed that I can and have made cheese. They can’t wait to taste some, and when I post pictures, they want to come over and eat them. I have to beat them off with a stick ha-ha.
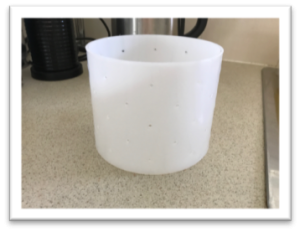
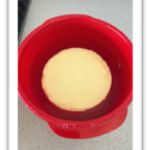
My favourite piece of equipment is a 130mm x 110mm Hoop, I use this one for all of my hard cheeses using 8 Litres of milk, it is the perfect size.
- 130mm – 110mm hoop
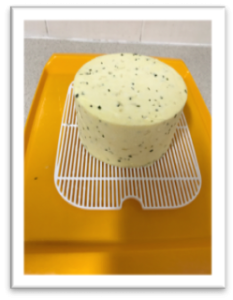
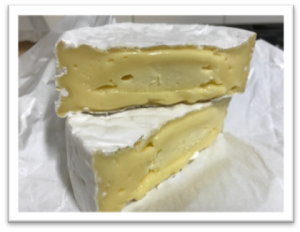
My favourite cheese to make is the Camembert and Brie; you get to see them develop quickly and change over the 12 days before wrapping. Below is a photo of my last Camembert that I wrapped on the 7th of March.
- Camembert
If I would give any advice to someone just starting out is to keep reviewing Graham’s notes and recipes, buy the book he recommends “200 Easy Homemade Cheese Recipes” and surf the internet, there is so much information out there which will help you find what you are looking for and give you the confidence to make it. The best piece of advice Graham gave me was to get in and do my first one. I haven’t looked back since. If I need more information or I am not sure of something I ring Graham who has really helped me on my journey.
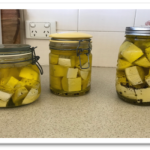
Below are some photos I have taken of my cheese.
- Feta marinated in oil and herbs
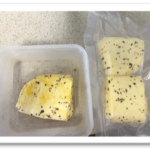
- Halloumi vacuum packed
- Cotswold and Camambert
- Monterey Jack in brine
I’d like to share with you the recipe for the “Cotswold”. I found this on the web in a forum. I excluded the Annatto colouring from my cheese as wanted the finished product to look like it would a have a hundred years ago.
Cotswold
Ingredients:
8L milk
mesophilic culture
• 1 dash & 1 pinch MTR4
• 2 x smidgen LH1
optional – 4 drops annatto colouring diluted in ¼ cup cool water
1.4ml calcium chloride in ¼ cup cool water
1.0ml rennet dissolved in ¼ cup cool water if using Maleny milk if not using Maleny milk 1.2ml. This gives you a set in 1 hour.
20-25grm salt
1 tablespoon dried chives
1 tablespoon dried onion
Directions:
1. Heat milk to 32c and add culture. Cover and ripen for 45 minutes at 32c.
2. Add annatto. Stir in thoroughly.
3. Add calcium chloride. Stir in thoroughly.
4. Add rennet, stir for 1 minute.
5. Keep at 32c and let set for 45 to 90 min. until clean break.
6. Cut curds to ¼ inch cubes.
7. Keep at 32c for 20 min and occasionally gently stir curds to prevent matting.
8. Raise to 40c over 35 min. Stir often enough to prevent matting.
9. Keep at 40c for 30 min. Stir continuously while cooking to prevent matting.
10. Let cooked curds rest for 5 minutes.
11. Drain curds into cheesecloth lined colander.
12. Place colander in pot and cover to keep curds about 38c until whey is done draining.
13. Drain pot completely and move curds into pot. Stir gently to un mat curds.
14. Add salt, chives and onions in multiple steps, stirring gently to mix evenly at each step.
15. Place curds in cheesecloth-lined hoop, press at 10 pounds for 15m.
16. Flip and rewrap and press at 30 pounds for 10 min.
17. Flip and rewrap and press at 40 pounds for 2 hours.
18. Flip and rewrap and press at 50 pounds for 24 hours.
19. Remove from press, wipe down with brine and let dry at room temp until dry and ready to wax.
20. Wax and age at 12.7c for 1 to 3 months. Turn daily for a couple weeks, then turn weekly.