What sparked your interest in making cheese
My interest in making cheese first began out of necessity- my parents had left 6 litres of milk in the fridge after visiting from California so I started off making fresh cheeses like Ricotta and Queso Fresco to use it up. I was so impressed with myself at being able to make something edible from milk, that a friend gave me Cheesemaking lessons for my birthday. Now it’s over a year later, but I still get a thrill at being able to make it myself.
How did you feel about the experience of making cheese and how did it turn out?
After my first course with Graham and learning to make cheeses like brie, camembert and feta, I did his second one as soon as it came up for Sydney – we learned to make blue cheese, haloumi, washed rind cheeses, whey ricotta, mascarpone, yoghurt and butter.
Camembert and Feta are still my favourites but I make blue cheese, Haloumi and Ricotta fairly regularly, I find they are good to have on hand for general eating and also cooking.
I love that I can read another cheese recipe from anywhere now and have an idea of what is happening at each stage of the process, and why – just from doing Graham’s courses and then researching the cheese I like to make I learn so much about so many styles of cheese. It’s given me a lot of confidence to try new things.
What has been some interesting or rewarding cheesemaking experience/s
I was reading about the French and Swiss who make a cheese from winter milk that is very soft, and so they strap thin strips of spruce around the cheese to help it keep shape. The spruce timber apparently adds a resinous flavour to the cheese.
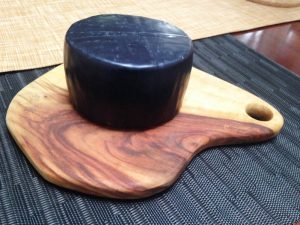
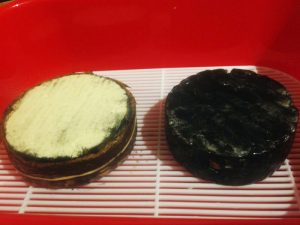
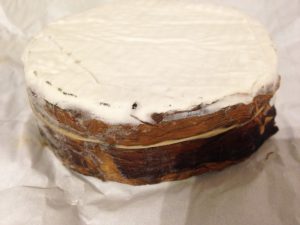
This gave me an idea about making an Aussie version. I love Australian bushfoods and adopting a method used by the Aborigines, I’ve used charred bark from the Paperbark tree for cooking chicken and fish. So I thought I’d experiment and make a Paperbark-wrapped Bushfood Brie.
I was aware that the European version uses the inside strip of bark, so I was careful to boil the paperbark to make sure there were no unwanted moulds. I then let it dry overnight and the next day I charred one side of the paperbark to bring out the natural oils.
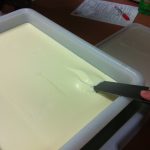
I then made the brie as per usual, and when it was ready to go into the wine fridge for ripening, I put a layer of proper cheesemaking ash on the edge of the brie, and added the paperbark strip around.
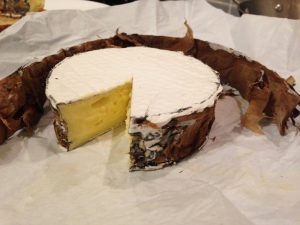
While the brie was ripening in the paperbark, I was really happy to see that the white mould grew well all over the cheese, and there were no ugly moulds anywhere to be seen.
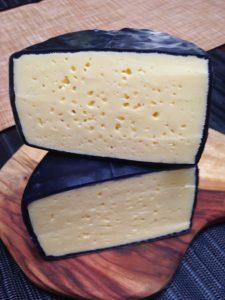
On tasting it, I was a tad disappointed that the flavour wasn’t more pronounced; but it was tasty and had an earthy mushroom flavour that was different to my regular Brie. The paperbark didn’t peel off from the cheese completely but it was so tissue-paper thin that it didn’t affect the eatability at all. Interestingly, it seemed that there was more flavour away from the edge where the bark was, and more to the inside. Perhaps the riper areas over-rode the paperbark flavour – I don’t know – but I’ll continue to experiment with this Paperbark Brie!
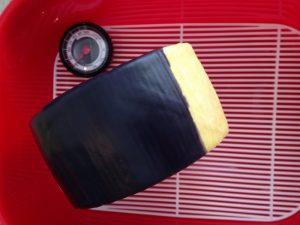
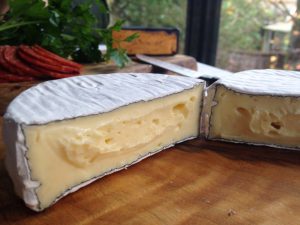
I am now making Leerdammer
I’ve also started experimenting with other recipes like the Leerdammer, a Swiss-style cheese but of Dutch origin.
From what I can tell reading other posts about it online, mine turned out as it should have, with lots of glorious holes! Though Leerdammer has smaller holes and the texture isn’t quite as firm – the flavour is quite similar to a Jarlsberg. It’s the largest cheese I’ve made at home yet – and even then, I had to divide the original recipes I took it from by about 5!
What is your advice to anyone looking to starting out on a cheesemaking journey?
My advice is, just do it – start making cheese – and the sooner the better. In the course you’re doing 6-7 cheeses, and it can be intense. It’s not like that at home at all. Make a camembert or a feta at home on the weekend after the course, and get into your own rhythm– you will surprise yourself at how much you know.