When did you take up cheesemaking and why? Or what sparked your interest in making cheese
Like most good things, cheese making came to me by sheer luck. I was looking to do something outside of my daily job, as a hobby, when one of my colleagues told me that his wife had done a cheese making course and how she was now making specialist cheeses at home.
Coming from a country where cheese is only popular in the form of Paneer, or industrially manufactured processed cheese (which I was not very fond of), I was completely unaware of the world of speciality cheeses. Since coming to Australia I was introduced to great wine which then led to its most popular partner – cheese. I never missed an opportunity to try a new cheese every time I was at a market or at a shop that sold speciality cheeses. From the gooey, buttery bloomies and washed rinds, to salty Feta and haloumis, to sweet, nutty Swiss and Dutch styles, to the bold and bitey Cheddar, Parmesan type hard cheeses and not to forget the unique aroma and flavours of the blues, each and every cheese a classic in its own.
To hear that I could actually make these wonders at home with my own hands was very exciting. I logged on to cheesemaking.com.au and immediately booked the course with Graham dated 30th and 31st August 2014.
What was the first batch of cheese you made by yourself? How did you feel about the experience and how did the cheese turn out? Can you compare your experience between then and now?
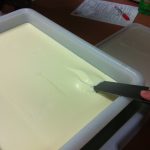
After completing the course, I had a slow start and it took me a few months to start making cheese at home. This was mainly due to my full time job taking up most of my time and energy. My first batches at home were soft fresh varieties and Feta style cheeses. I didn’t have any equipment to maintain temperature for long ageing and pressing the curds to make hard cheeses. So, I was limited to what I could make.
The early cheeses were nice and I got a lot of inspiration from them to continue and develop my cheese making further.
What sort of cheeses do you make, how many times have you made cheese, why do you like making cheese and how often do you make it?
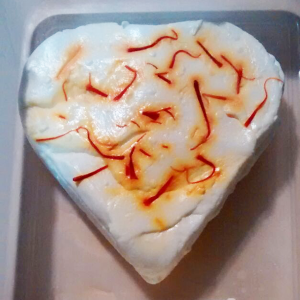
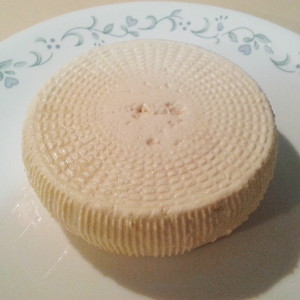
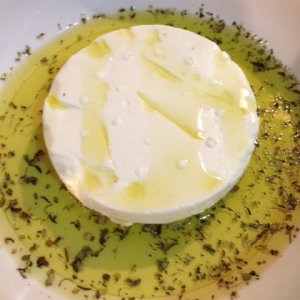
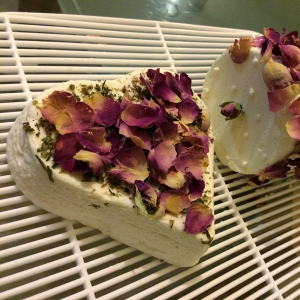
I still make soft fresh cheeses and try different additions to these to enhance the taste, texture and visual impact of the cheese.
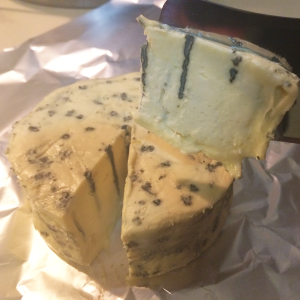
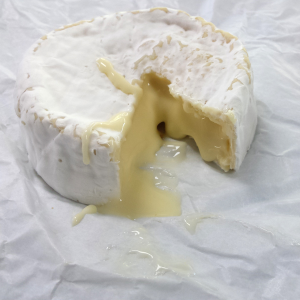
However, since the early days of making soft fresh cheeses, My interest kept growing and I wanted to do more, so I bought a small wine fridge. This took my cheese making to a new level and I started making Bloomy rind cheeses. I remember my initial Camembert had the texture of a semi hard cheese. This was due to over drying the cheese. It was a great learning experience and straight up I made the next batch and got it right. I have even made a Blue vein cheese following a simple recipe found online and the results were quite impressive.
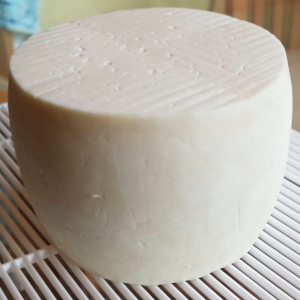
In the last few months I have bought a cheese press and this has allowed me to explore the realm of semi hard and hard cheeses.
I am still in the very early stages or as they would say in the world of cheese – I am on the “edge of the wedge” with regards to cheese making. I am researching a lot and reading a lot about cheese making. I am learning from every cheese I make and I keep trying to improvise one batch to next.
To explain my cheese making journey so far in one sentence, I can put it as, “what started as a hobby has turned into a passion and I now find myself thinking of, reading about and wanting to make cheese every day.”
What has been some interesting or rewarding cheesemaking experience/s
The most rewarding part of making cheese is sharing it with family and friends and watching the smiles come onto their faces as they bite into a slice.
For me it is also great joy to have my three year old son around. He likes to help me stir the curds and he is also one of my best customers. He loves my cheeses and eats them with genuine happiness. He is always eagerly enquiring on the progress of my cheeses and waiting for them to be ready, taken out of ageing and cut open to taste and eat.
Lastly, it is very motivating and inspiring when I get honest responses and feedback on my cheeses (good and bad). As these help me to continue striving to make better cheese.
What has been your biggest cheesemaking challenge/s
Trying to find enough time to make cheese in between full time work, family and social commitments has been difficult for me. Am working on this and slowly getting better at it. Luckily my wife supports my passion (in return for a portion of the end product of course).
Finding sheep’s milk is still my biggest challenge. I want to try and make sheep’s milk cheese. So, am trying to find a source of Sheep’s milk.
What is your favourite cheese(s) to make?
On the top of my list of favourite cheeses to make is Camembert and Brie. This is closely followed by Gouda and Cheddar. Lastly, my affair with Blues has just begun and will be going a long way.
I have not tried making washed rinds and Alpine style cheeses yet. But I love eating them. So, hoping they will make it on the list soon.
What is your advice to anyone looking to starting out on a cheesemaking journey?
If you are thinking of making cheese – Just go for it. Take a deep breath, close your eyes, and take the plunge. Graham’s courses are a great way to start the journey. You learn a lot in a short time and it forms a great base to build up from.
Last but not the least, get the basics right first and then let your imagination run wild.
Hemant’s Recipe for Belper Knolle
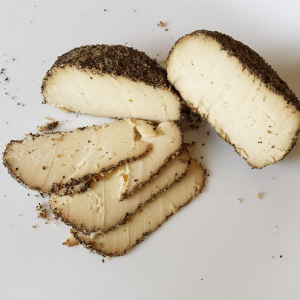
This is a cheese that I had not seen or heard of in Australia. I came across it while researching on the internet and tried making it a couple of times. It is a delightful little cheese from Switzerland that looks like rocks but is full of flavour. I got family and friends to try the cheese and they all liked it very much. So, I will share this recipe with you all.
Belper refers to the area of Belp where this cheese originated and Knolle translates to tuber or truffle, and it lives up to its name. It is a little nugget of intense flavour and is served as shavings, like a truffle. For those that have done Graham’s Intensive Cheesemaking Course 1, the process starts similar to the Chabichou and Quark recipe.
Ingredients list:
- Full cream unhomogenised milk
- Starter culture – M235 (Aromatic Mesophile)
- Calcium Chloride
- Rennet
- Cheese Salt (or Himalayan Pink Salt)
- Garlic
- Peppercorns
Equipment List:
- Stainless steel pot
- Thermometer
- Ladle
- Large Colander
- Butter muslin (cheese cloth)
- Drying mats
Please ensure all equipment is clean and sanitised before use.
Day 1:
- Take 4 litres milk and warm it to 20C – 25C
- Add 1ml Calcium Chloride asap
- Add approx. 1 Pinch to 1 Dash of M235 Mesophile
- Add 2 drops of 200 IMCU strength Rennet
- Incubate at 20C – 25C overnight until the curd firms up like a yoghurt and a small amount of whey appears on top of the curd
Day 2:
- Line the sanitized colander with the cheese cloth
- Using the ladle, scoop the curds into the cloth allowing the whey to drain off
- Gather the cheese cloth, tie it securely and hang it for further drainage
- Drain for several hours to achieve a texture that can be rolled into balls (Note: if the cheese is too moist it will slump and if it is too dry then it will crumble. Also, to get uniform drying, open the cheese cloth and mix the curds together a couple of times during this draining stage)
- Once the curd has sufficiently drained, take 1.5 tsp of cheese salt and 2 – 3 medium cloves of garlic into a mortar, and crush them together using a pestle to form a uniform paste.
- Transfer the curd into a bowl and mix the salt and garlic paste uniformly into the curd.
- Let the curd sit (while you prepare the black pepper coat)
- Grind 1.5 – 2 tbsp toasted peppercorns to a medium fine size (Note: You can either use a mortar pestle for this or a coffee mill reserved for spices works well too)
- Spread out the ground peppercorns onto a large plate or tray
- Take a small handful of the cheese mix and form it into a ball (slightly larger than a golf ball)
- Roll the cheese ball into the ground pepper to get a good even coating of the pepper on the cheese (Note: The cheese is quite moist and tender at this stage, so handle it very gently)
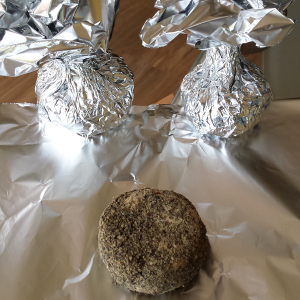
- Transfer the pepper coated cheese balls to the drying mat
Drying & Ageing:
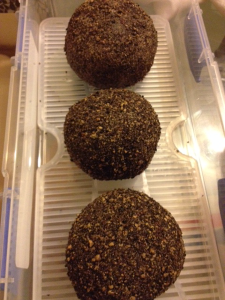
- Allow the cheese to dry at around 10C – 15C and 65% – 70% humidity until a firm dry crust is formed on the cheese. It will also become a lighter colour as it dries.
- Now move the cheese to the cave at 11C – 13C and 75% – 80% humidity
- The final cheese will be ready in 4 – 6 weeks but will continue to improve in flavour for a few months