Waxing cheese is one of several ways to preserve your cheese while it matures. Other prominent ways of preserving and storing cheese are cheese wraps, vacuum sealing, natural rind, plant leaves, straw, ash and using coatings such as lard, butter, olive oil and PVA (polyvinyl acetate).
Waxing is a simple process and provides your cheese with a solid coating that gives your cheese an attractive look, to both the cheesemaker and the consumer. The wax barrier will protect the cheese physically against minor bumps, stop microbes from growing on the cheese surface, especially yeasts and mould and stop the cheese from drying out. All of this while the cheese matures.
These instructions have been prepared to assist you in applying wax to the surface of your cheese.
All cheese wax must be food-grade. Wax is usually called microcrystalline wax, is food grade and is subject to the formulation of the manufacturer. Microcrystalline wax, as the name implies, has a small crystal size because the grain is finer, which provides greater surface area coverage, a brighter colour, better viscosity and a higher melting temperature. It is quite a firm wax that has very good resilience to absorb bumps that might crack other waxes. It is the same wax used by many commercial cheese manufacturers.
Equipment Required
Once you have purchased your wax, you will require the following:
- a very basic stainless-steel pot/container with a lid to heat, hold and store the wax
- pastry brush or similar (optional)
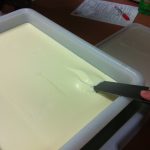
- stirrer (e.g. old wooden or metal spoon or this piece of timber or a piece of long cutlery)
- wax
- thermometer
Find a basic stainless pot + lid (try a dollar store type), as you cannot use it for any other purpose apart from waxing once you start using it for wax. For 1kg wax, a container approximately 15cm wide will be enough. If the container is too wide you will not have the depth of wax to cover the cheese. If the pot is too narrow you may not be able to fit the cheese into the container. The wax stays in this pot all its life.
A handy option: If you have been provided clear wax with colour bottles, try waxing your cheese using just the ‘clear wax’. The clear wax is a good alternative to coloured wax and it allows you to see the cheese under the wax. If you do not prefer the ‘clear’ option, add the colour for the next cheese.
Cheese Preparation
The cheese to be waxed needs to be prepared carefully. Cheese that needs to be waxed should be aged for at least a few days, preferably longer, in a low-humidity room. This allows the excess moisture within the cheese to migrate to the surface, and then the cheese surface needs to dry out.
The cheese needs to be completely dry. Very dry. Cold cheese attracts condensation, meaning the surface will be ‘moist’. Wax will not adhere to a damp or wet cheese surface. If the cheese is stored in the fridge, you should leave the cheese out of the fridge, on a rack, for 30 minutes to allow any condensation that builds up to disappear. However, on a hot day, the cheese should not stay out of the fridge for longer than 30 minutes, as these high temperatures will ‘melt’ the surface of the cheese and create an oily surface. The wax will not stick to an oily surface. So, on hot days the ideal place to hold the cheese is in a slightly cool or tempered room or esky.
Remove any loose cheese with a spatula or knife. If the cheese has any surface cracks, pat down those cracks with a spatula or knife. If there is mould on the cheese, this can be removed by washing it with a 20% salt solution and then allowing the cheese to dry out.
Waxing the Cheese
To get started, place all or part of the wax into the pot and place the pot into a larger pot that contains water. Creating a double boiler situation. The water needs to be about the same level as the wax. Heat the double boiler on a low heat setting until all the wax melts. Do not place the wax pot directly on the stove, it has a flashpoint and may catch fire. Do not try to rush the melting; it usually takes about 20 – 30 minutes to fully melt depending on the quantity of wax. Leave the double boiler to simmer. A wax heating temperature of 80°C – 90°C is ideal for the wax to be eventually fully melted. Do not heat the wax past 90°C. Give the melting wax an occasional stir to get more even melting.
If your wax is supplied with colour, add about ½ of the provided colour to the hot wax and stir in very well, using a few good stirs over a few minutes. You can add the remainder of the colouring if you require a deeper colour.
Allow the coloured wax to cool to 65°C (+/- 5°C) before waxing the cheese.
There are two ways to apply the wax:
With a dedicated pastry brush
- Use the brush as you would use a paintbrush. Brush the wax onto the cheese and turn the cheese as you go. This method may leave brush marks on the cheese.
Dipping the cheese into the hot wax
- Pick up the cheese, make sure your hands are clean and dry, and dip the cheese into the hot wax so that slightly more than half of the cheese is immersed in the wax. Then hold it there for 4 – 5 seconds maximum. Move the cheese back and forth very slowly during this time to help remove any air bubbles from the surface of the cheese. Do not exceed 4 or 5 seconds or the cheese will melt. After 4 – 5 seconds is up, lift the cheese up and hold it a few centimetres above the wax for about 10 seconds so the residual wax drips back into the wax pot.
Place the cheese on the bench, wax side up, for a few minutes, for the wax to cool then repeat the process for the other ‘half’ of the cheese. If you pick up the cheese while the wax is still warm, there may be partly melted cheese under the wax that will separate from the wax and cause the cheese will slip out of the wax coating. Make sure that when waxing the 2nd half of the cheese, you slightly ‘overlap’ the 1st dipping line, so no cheese is left unwaxed.
Before waxing, use a thin piece of timber or cutlery to stir the wax (I use a wooden spoon) at the time of waxing to ensure it is an even consistency and temperature. Use a thermometer to measure the temperature of the wax.
Finishing touches
Once the waxing has been completed, closely inspect the cheese to make sure there are no pinholes in the wax or there are any unwaxed sections of the cheese. A pastry brush can be used to patch up any small holes (as small as pinholes) or gaps that might appear on the cheese after it is waxed.
Finished waxing
When the waxing is complete, remove the pot from the stove, replace the lid, allow it to cool and store until required again. The wax does not have a use-by date. If you used a stirrer, it may be easiest to allow the wax to remain on the brush and stirrer, and when they cool, wrap in glad wrap and store with the cooled wax until the next time waxing is required.
A few tips
- If the wax is too hot, the layer of wax will be very thin, and the cheese under the wax will melt too much. In some situations, the wax may even slip away from the cheese.
- If the wax is too cold, you will get a very thick and uneven layer of wax on the cheese.
- Some people prefer to ‘double dip’, meaning they apply two coats of wax. That is fine. to do this.
- When you have finished with the thermometer, remove any solidified wax; wipe the probe firmly with a piece of paper towel while the wax is still very hot. Then pour hot water from the kettle over the probe, to remove any residual wax and give a final wipe clean.
- I was taught this by a wine maker getting ‘shiny’ wax on top of his wine bottles. As soon as the cheese is removed from the wax, dip the waxed portion of the cheese into a container of very cold water. You should get a clear (as opposed to a mat) finish on your wax. Note: do not let any of this water contact the cheese that is not waxed.
Dangerous, be careful!
- Wax is flammable and should not be placed directly into a pot on the stove. Always use a double boiler.
- When the wax melts, it is hot, and it can burn your skin. Always use implements to wax the cheese.
Happy cheese waxing!
Graham