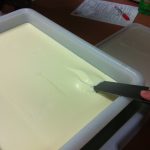
The purpose of pressing and moulding of cheese is to:
- produce the desired size and shape of cheese
- form all of the individual particles of curd into one cheese that can then be ripened, packaged and stored
- speed up removal of free whey
- consolidate the curd by removing the air and spaces between curd pieces
- create the initial stages of rind formation
The main variables that need to be controlled during pressing are the amount of pressure applied to the cheese, how fast pressure is applied, the temperature of the cheese during pressing and the length of time the cheese is pressed.
The amount of pressure: Some cheese such as fresh acid, blue mould and white mould, the curd is moulded and no pressure is applied, the cheeses are simply turned 180 degrees and allowed to be pressed under their own weight. Cheese such as Cheddar and Emmenthal are pressed at high pressures for several hours. In the case of eye-type cheese, prepressing may take place under the whey, usually after the curd is placed in the mould. Other cheese such as Tilsit and Havarti with some eyes and openness only have a moderate amount of pressure applied.
Applying pressure slowly: Pressure must be applied gradually to ensure that whey and air can escape through the natural channels between the curd pieces before pressure builds up sufficiently to close off the channels. 30 – 60 minutes is sufficient time before the full pressure is applied.
The temperature of the curd: The curd needs to warm when it is placed in a hoop just prior to pressing. Curd particles that are cold or have dried out will be hard and will not matt together sufficiently. If curd is salted prior to hooping (eg Cheddar) then the curd needs to be kept warm to allow the salt to slowly diffuse into the curd for approximately 10 minutes prior to being moulded and pressed. The curd should be kept warm while it is in the press.
The length of time the cheese is pressed: Pressing time can vary from 30 minutes to 24 hours. Pressing needs to be applied slowly at first and then gradually increased. This allows air and moisture to move from via natural channels from the inner to the outer layers of the cheese. Pressing at a too fast rate may close these channels and trap air and moisture in the centre of the cheese. The cheese hoop or mould should be lined with a cheese cloth, which can be made of cotton or synthetic material (blue cheese cloth) to aid in drainage of whey and to produce a smooth close surface finish. Once the cheese has been pressed, it is usually taken from the press after about 30 – 60 minutes, to straighten the outer cloth so an even surface results on the finished cheese. The cheese is then usually pressed overnight. The following morning the curds have cooled considerably and been ‘set’ so additional pressure should not be applied the following morning. Keeping the curd warm after pressing is important especially on cool days. .
There are a large variety of cheese presses used by home and commercial cheesemakers. Pressure can be applied by hydraulics, spring or by vacuum.


